There are desserts that make you smile, and then there are desserts that make time stand still. The Crème Brûlée Cheesecake falls firmly into the latter category. As someone who has spent countless hours perfecting this recipe in my kitchen (and enjoying every delicious failure along the way), I can confidently say this dessert marries the silky-smooth texture of classic cheesecake with the crackling caramelized sugar top of crème brûlée in a union that feels almost magical.
The first time I attempted this recipe, I was intimidated. Two notoriously finicky desserts combined into one? But trust me, I’ve broken down every step to ensure your success. Whether you’re preparing for a special occasion or simply want to treat yourself to something extraordinary, this recipe deserves a place in your collection.
The History Behind This Decadent Fusion
Before diving into the recipe, I find it fascinating to consider how this dessert came to be. Cheesecake’s history dates back to ancient Greece, where it was served to athletes during the first Olympic games. Meanwhile, crème brûlée’s origins are disputed between England and France, with both claiming to have invented this custard with its signature caramelized top.
Combining these two classics creates something entirely new yet familiar. The marriage happened likely in upscale restaurants looking to innovate classic desserts in the 1990s, when fusion cuisine was reaching its peak. Today, this dessert has become a staple on restaurant menus worldwide, but making it at home allows for customization and that prideful feeling of creating something spectacular.
Essential Ingredients Breakdown
Let’s break down what you’ll need for this showstopper:
For the Graham Cracker Crust:
- 2 cups graham cracker crumbs (about 15-16 full sheets)
- 1/4 cup granulated sugar
- 1/2 cup (1 stick) unsalted butter, melted
- Pinch of salt
For the Cheesecake Filling:
- 4 packages (32 oz total) cream cheese, at room temperature
- 1 1/2 cups granulated sugar
- 4 large eggs, at room temperature
- 2 egg yolks, at room temperature
- 2 tablespoons all-purpose flour
- 1/4 cup heavy cream
- 1/4 cup sour cream
- 1 tablespoon vanilla bean paste (or 2 teaspoons vanilla extract)
- 1 vanilla bean, seeds scraped (optional, for enhanced flavor)
- Zest of one lemon
For the Crème Brûlée Topping:
- 1/2 cup granulated sugar (for caramelizing)
- 2 tablespoons turbinado sugar (adds extra crunch)
Key Ingredient Definitions
graham cracker crumbs : The foundation of our crust. These sweet, honey-flavored crackers provide the perfect contrast to the creamy filling. You can make your own by pulsing graham crackers in a food processor or purchase pre-made crumbs.
cream cheese : The star of any cheesecake. Philadelphia brand is my go-to, but any full-fat cream cheese will work. Absolutely essential that it’s at room temperature to avoid lumps.
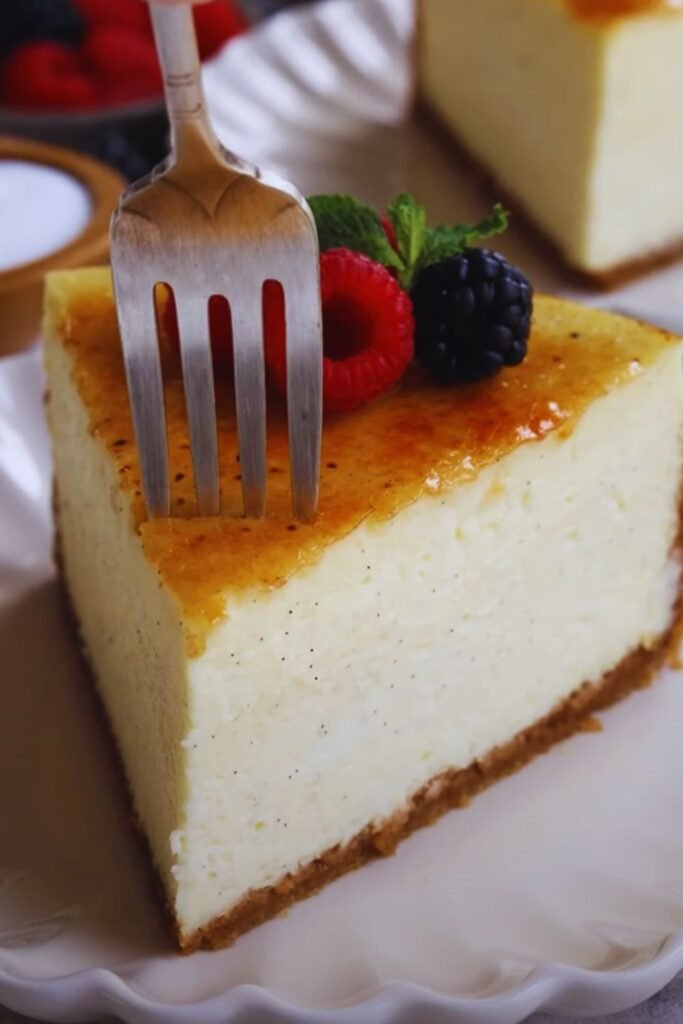
vanilla bean paste : A concentrated form of vanilla extract that contains visible vanilla bean seeds. It provides more intense flavor than extract and those beautiful specks throughout your cheesecake.
turbinado sugar : A partially refined sugar with large crystals that caramelize beautifully. It creates that perfect crackling top we’re aiming for.
Equipment You’ll Need
Before starting, ensure you have these tools on hand:
- 9-inch springform pan
- Food processor (for making graham cracker crumbs)
- Stand mixer or hand mixer
- Large roasting pan (for water bath)
- Kitchen torch
- Aluminum foil (heavy-duty preferred)
- Instant-read thermometer
- Cooling rack
- Offset spatula
The kitchen torch is crucial for achieving that perfect caramelized sugar top. While you can use your oven’s broiler in a pinch, a torch gives you precision control that makes all the difference.
Step-by-Step Process
Preparing the Perfect Crust
- Preheat your oven to 325°F (165°C).
- Wrap the outside of a 9-inch springform pan with a double layer of heavy-duty aluminum foil, covering the bottom and extending all the way up the sides. This prevents water from seeping in during the water bath baking process.
- In a food processor, pulse graham crackers until finely ground.
- In a medium bowl, combine graham cracker crumbs, sugar, melted butter, and salt until the mixture resembles wet sand.
- Press the mixture firmly into the bottom and about 1-1/2 inches up the sides of the prepared springform pan. Use the bottom of a measuring cup to compact the crust evenly.
- Bake the crust for 10 minutes, then remove from the oven and let cool while preparing the filling. Keep the oven on.
Creating the Silky Cheesecake Filling
- In the bowl of a stand mixer fitted with the paddle attachment, beat the cream cheese on medium speed until completely smooth and free of lumps, about 3 minutes.
- Gradually add the sugar and continue beating until incorporated and fluffy, about 2 minutes more.
- Add the eggs and egg yolks, one at a time, beating well after each addition and scraping down the sides of the bowl as needed.
- Mix in the flour until just combined.
- Add the heavy cream, sour cream, vanilla bean paste, vanilla bean seeds (if using), and lemon zest. Beat on low speed until just combined. Avoid overmixing, which can incorporate too much air and cause cracks.
- Pour the filling into the cooled crust and smooth the top with an offset spatula.
The Water Bath Method: Essential for Perfect Texture
I cannot emphasize enough how crucial the water bath is for achieving that silky-smooth texture. Here’s how to do it right:
- Place the foil-wrapped springform pan in a large roasting pan.
- Place the roasting pan in the oven and carefully pour hot water into the roasting pan until it reaches halfway up the sides of the springform pan.
- Bake until the cheesecake is set around the edges but still has a slight jiggle in the center, about 1 hour and 30 minutes to 1 hour and 45 minutes.
- The internal temperature should reach 150°F (65°C) when measured with an instant-read thermometer inserted into the center.
- Turn off the oven, crack the door open slightly, and let the cheesecake cool in the oven for 1 hour. This gradual cooling helps prevent cracks.
- Remove from the oven and water bath, carefully peel off the foil, and let cool completely on a wire rack, about 2 hours.
- Cover with plastic wrap and refrigerate for at least 8 hours, preferably overnight.
The Grand Finale: Creating the Brûléed Top
This is where the magic happens! After your cheesecake has thoroughly chilled:
- Gently run a thin knife around the edges of the pan and release the springform sides.
- Transfer the cheesecake to a serving plate.
- Blot any moisture from the top of the cheesecake with a paper towel.
- Evenly sprinkle the granulated sugar and turbinado sugar mixture over the top of the cheesecake, creating a thin, even layer.
- Using a kitchen torch, melt the sugar by moving the flame continuously across the surface until it bubbles and turns a deep amber color. Keep the torch moving to avoid burning any one spot.
- Allow the caramelized sugar to harden for about 5 minutes before serving.
Troubleshooting Common Issues
| Problem | Cause | Solution |
|---|---|---|
| Cracked cheesecake | Overmixing or rapid temperature changes | Mix just until ingredients are incorporated; allow for gradual cooling in the oven |
| Soggy crust | Water leaking into the pan | Use multiple layers of heavy-duty foil; consider using a slow cooker liner as additional protection |
| Lumpy filling | Cold cream cheese | Ensure cream cheese is fully at room temperature (at least 2 hours on counter) |
| Sugar won’t caramelize properly | Moisture on cheesecake surface | Thoroughly blot the top with paper towels before sprinkling sugar |
| Cheesecake not setting | Underbaking | Use an instant-read thermometer to ensure center reaches 150°F |
| Burnt sugar topping | Torch held too close or in one spot too long | Keep torch moving constantly and hold at least 2 inches from surface |
Make-Ahead and Storage Tips
One of the many things I love about this dessert is how well it works for entertaining. Here’s how to time it perfectly:
| Timeframe | Storage Method | Notes |
|---|---|---|
| 1-5 days ahead | Refrigerated without sugar topping | Cover tightly with plastic wrap |
| Up to 2 months ahead | Frozen without sugar topping | Wrap in plastic wrap and aluminum foil |
| Day of serving | Add sugar topping just before serving | Caramelized sugar begins to soften after 2 hours |
| Leftovers | Refrigerate up to 5 days | Sugar top will soften but still taste delicious |
For the absolute best presentation, I recommend making the cheesecake 1-2 days in advance, keeping it refrigerated, and then adding the caramelized sugar top right before serving. This ensures both perfect texture and that signature crackling sound when your guests break through the top.
Flavor Variations to Explore
While the classic version is divine, I’ve experimented with several variations that are worth trying:
Espresso Crème Brûlée Cheesecake
Add 2 tablespoons of espresso powder to the filling for a coffee-infused variation that pairs beautifully with the caramelized top.
Citrus Infusion
Increase the lemon zest to 2 tablespoons and add 1 tablespoon of orange zest for a bright, citrusy version.
Chocolate Bottom
Add 1/4 cup cocoa powder to the graham cracker crust mixture for a chocolate base that complements the vanilla filling.
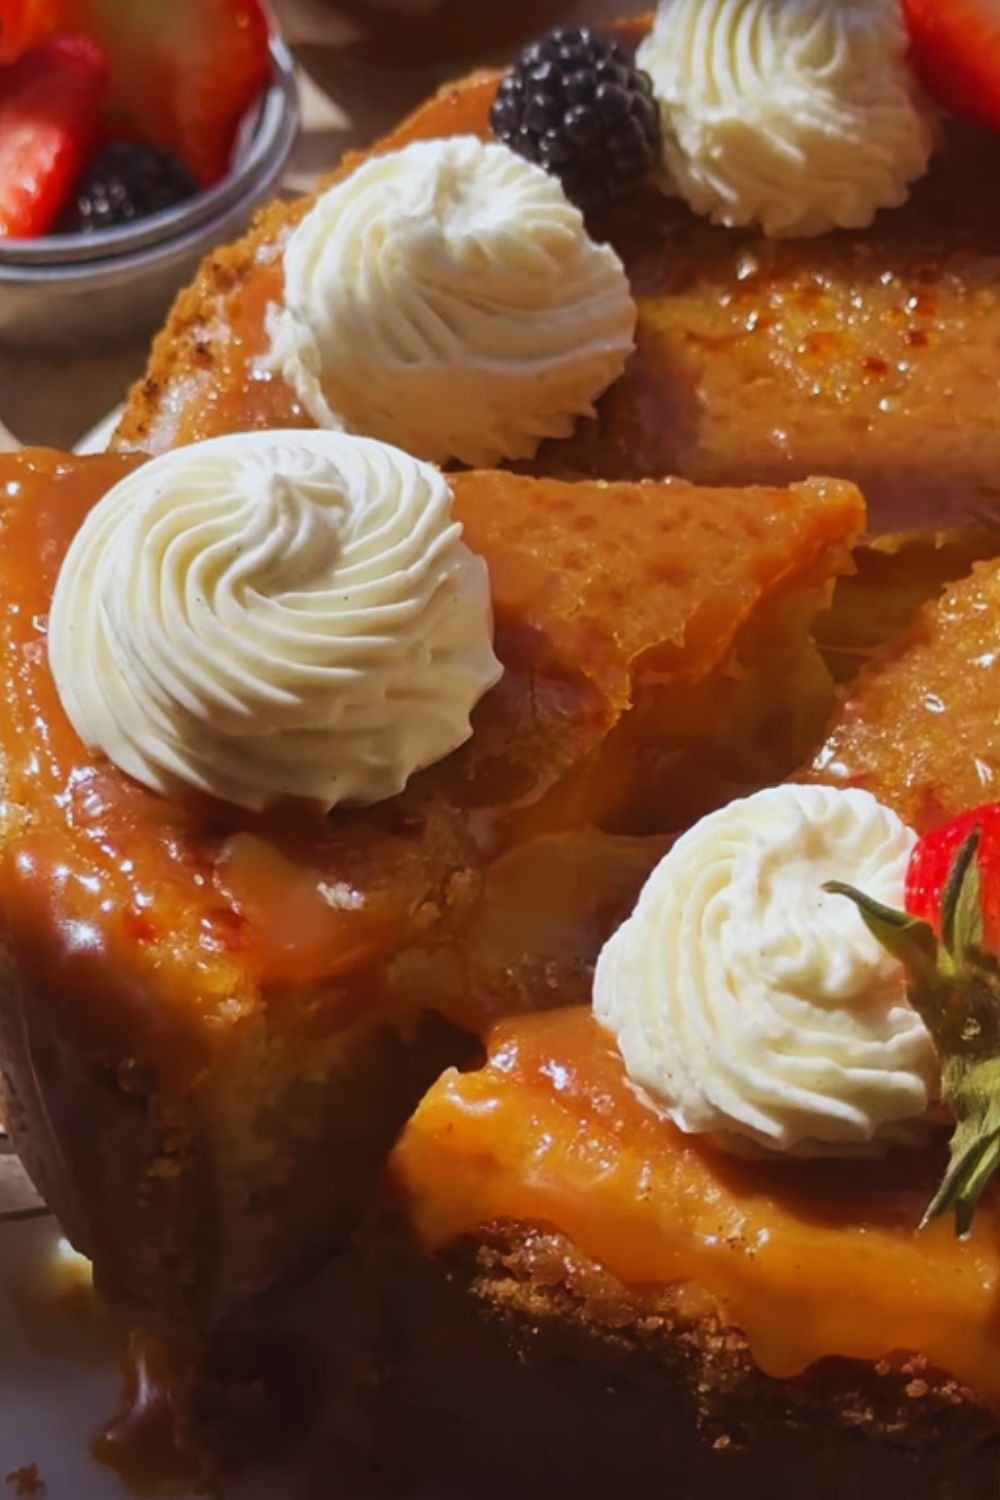
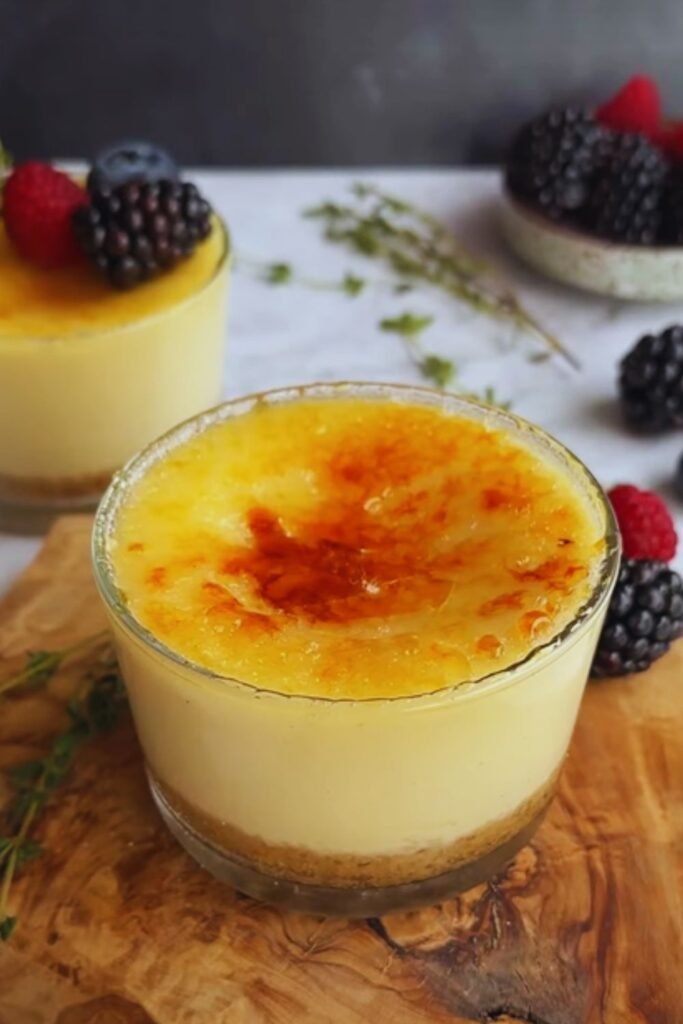
Seasonal Berry
Before caramelizing the top, arrange a circle of fresh raspberries or sliced strawberries around the outer edge, then apply the sugar within that circle.
Serving Suggestions
A dessert this spectacular deserves thoughtful presentation. Here are my favorite ways to serve it:
- With a small dollop of lightly whipped cream and fresh berries
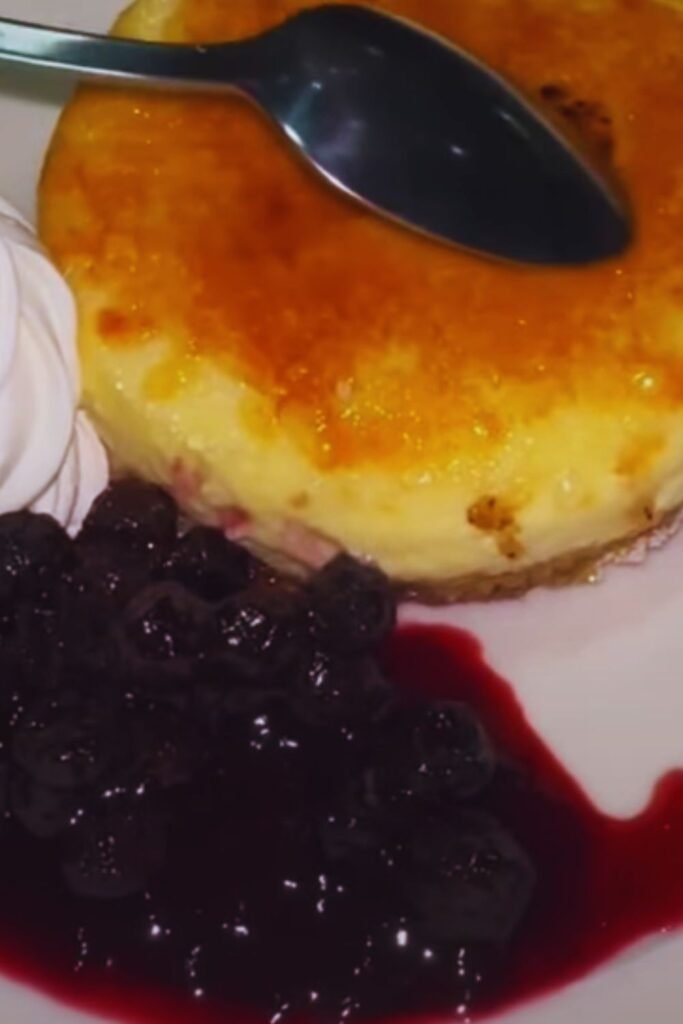
- Accompanied by a raspberry or blackberry coulis for color contrast
- With a sprinkle of crushed pistachios around the plate for texture
- Alongside espresso or French press coffee to cut through the richness
- With a drizzle of high-quality aged balsamic reduction for the adventurous
- Paired with a scoop of homemade vanilla bean ice cream for an indulgent treat
For an elegant touch, I sometimes place edible gold leaf on top of the caramelized sugar. It’s completely optional but makes for a stunning presentation at special gatherings.
Nutritional Information
For those who like to keep track, here’s the approximate nutritional breakdown per slice (assuming 12 slices per cheesecake):
| Nutrient | Amount |
|---|---|
| Calories | 490 |
| Total Fat | 35g |
| Saturated Fat | 20g |
| Cholesterol | 185mg |
| Sodium | 350mg |
| Total Carbohydrates | 42g |
| Sugars | 32g |
| Protein | 7g |
Why This Recipe Works: The Science Behind It
Understanding the science helps ensure success. Here’s what’s happening in this recipe:
- The water bath provides gentle, even heat that prevents the proteins in the eggs from overcooking and becoming rubbery. It maintains a consistent temperature around the cheesecake.
- Room temperature ingredients blend more smoothly and trap air bubbles that provide the perfect texture.
- Gradual cooling in the oven prevents the dramatic temperature change that causes surface cracks as the cheesecake contracts.
- The caramelization process is actually a chemical reaction called the Maillard reaction, where sugars break down under heat to create hundreds of new flavor compounds.
Questions & Answers
Can I make this without a kitchen torch? Yes, you can use your oven’s broiler. Place the chilled cheesecake on the top rack, about 4 inches from the broiler. Watch it carefully as it will caramelize quickly, in about 1-2 minutes. Rotate if necessary for even browning.
Why did my cheesecake crack even with a water bath? Even with a water bath, overmixing the batter can incorporate too much air, leading to cracks. Make sure to mix on low speed and only until ingredients are just combined. Also, ensure you’re cooling it gradually in the oven.
Can I use a different type of cookie for the crust? Absolutely! Digestive biscuits, gingersnaps, or even chocolate wafer cookies make excellent alternatives. Adjust the butter slightly as needed to achieve the “wet sand” consistency.
How do I know when the cheesecake is done baking? The perfect cheesecake should still have a slight jiggle in the center (about a 2-3 inch circle) when you gently shake the pan. The edges should be set and slightly puffed. An instant-read thermometer inserted in the center should read 150°F.
My caramelized top got soft after a few hours. Is there a way to prevent this? This is natural and unavoidable due to moisture migration from the cheesecake to the sugar layer. For best results, caramelize the sugar just before serving. If you need to do it in advance, accept that the topping will soften somewhat but will still be delicious.
Final Thoughts
What I love most about this Crème Brûlée Cheesecake is how it transforms any gathering into a special occasion. The combination of velvety cheesecake and that dramatic crackable sugar top creates a sensory experience that’s greater than the sum of its parts.
Yes, it takes time. Yes, there are multiple steps. But the result is a dessert that will have your guests talking for weeks. And that moment when everyone falls silent as they take their first bite? That’s culinary magic, my friends.
I hope you’ll give this recipe a try, and remember – even if it doesn’t turn out picture-perfect the first time, it will almost certainly still be delicious. Baking is a journey, and this particular destination is well worth the effort.

